
Replacing a bathroom faucet is a challenging yet satisfying DIY plumbing job. It requires patience and only a few efforts. Still, there are few essential things for a smoother, quicker, and leak-free faucet replacing.
Today, I’m here to represent the most straightforward procedure of ‘how to replace a bathroom sink faucet’.
Let’s do it!
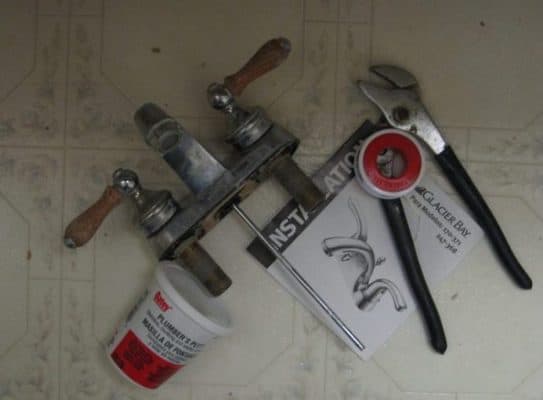
Things You’ll Need
You don’t need any special tools to start this DIY project. Let’s have a look at the required tools.
- Adjustable wrench
- Basin wrench
- Silicone caulk
- Plumber’s putty
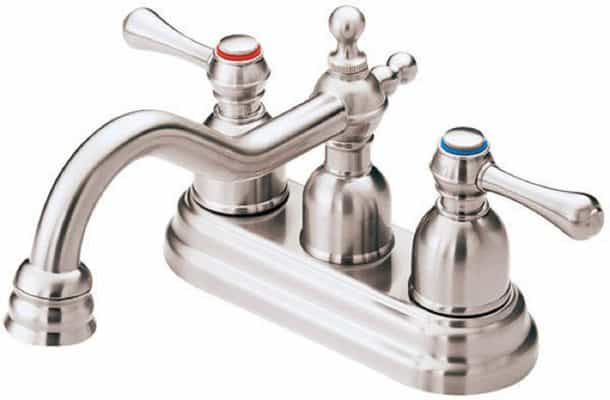
- A new bathroom faucet
- Bucket
- WD-40
- Rags or towels
- Knife or putty knife
- Plumber’s tape
Replacing Bathroom Faucet
Changing the bathroom faucet has two primary phases. At first, you have to remove the old faucet than install the new one. Here, we’ll describe both steps adequately. Let’s start with the removing phase.
Removing the Old Faucet
Removing the old faucet is the first step in changing your bathroom faucet. Keep an eye on our step-by-step guide to remove bathroom sink faucet with ease.
Step 1: Turn off the Water Supply
At first, turn off the water supply by using the valves. Most of the cases, this valve is located underneath the sink. You have to rotate the valve clockwise until it stops rotating.
If you have any corrosion under there, you’ll need some lubricant or penetrating oil to remove that decay.
After turning off the water supply successfully, turn on the faucet again. It will release the air pressure within the water lines.
Step 2: Remove the Water Supply Line
After turning off the water supply, it’s time to get rid of the water supply line. If your sink has both hot and cold water lines, you have to remove both of those.
You’ll need an adjustable wrench to detach the supply lines. At first, loosen the nuts where the supply lines are attached to the hose. Then use the basin wrench to loosen the nuts which are connected between the tubes and faucet.
Step 3: Disconnect the P-Trap
There is a J-shaped pipe under the sink. This pipe is known as P-trap. You’ll notice a little bit of water fallout after disconnecting the P-trap. That’s why you should put a bucket under that before completely detaching the P-trap.
Even after that, you may notice a few drips on the floor. Wipe those immediately by using the towel or rug.
Once the rags and the bucket are ready, rotate the nuts counterclockwise to remove those. If the nuts are too tight to rotate, use a wrench instead of your hands. You may need to use wd-40 if you can’t rotate the nuts using a wrench.
Step 4: Disconnect the Lift Rod
Finally, disconnect the lift rod for the drain plug. This plug will be attached to the sink by using a screw.
Step 5: Lift the Faucet
If you can successfully perform the previous steps, the faucet will lift pretty easily. If it doesn’t pull out, you may remove all of the nuts from the sink. Recheck all of the nuts and hope that you’ll find at least one nut under the basin.
Step 6: Clean the Surface
After removing the faucet, you may notice some leftover corrosion or dust in there. Use a rug to remove those. You may also use wd-40 to remove the hard-to-remove corrosion.
That’s it! You just removed your ancient faucet. It’s time to attach the new one.
Installing the New Faucet
Installing a new faucet isn’t rocket science. You just need to perform the previous tasks in the opposite direction. Let’s take a look at the full process.
Step 1: Use the Silicone Caulk
Before starting the installation process, use some plumber’s putty or silicone caulk in the sink base. It will work as an adhesive. And it keeps the sink attached to the new faucet firmly in place.
Step 2: Insert the Faucet Shank
Now insert the faucet shank into the deck plate. Then it will automatically go through the sink hole.
Step 3: Tighten the Nuts
After inserting the shank, you have to tighten the nuts. It will keep the faucet in place. However, different manufacturers put their faucet nuts in different areas. So, don’t get confused if it doesn’t match with your previous one.
If you can’t understand the nut placing, get help from the installation manual. You will get that manual in the faucet package. Remember, don’t over tighten!
Step 4: Install the Drain
Most of the faucets come in partially assembled drain. If the gasket is connected with the flange or drain nut, remove that first. You may use a small amount of plumber putty under the flange before placing it inside the sink.
Then use an adjustable wrench to tighten the nuts. If you leave those nuts without tightening properly, your sink will leak in the future.
Step 5: Hook-up the Water Supply
Here comes the most crucial part. After connecting the faucet with the sink, it’s time to hook-up the water supply. If your new faucet has only one water output line, then just connect the water supply pipe with the hole under the tap.
However, if your faucet has both hot and cold water output system, you’ll notice three different holes under the faucet. In that case, you have to attach the water supply line into the middle hole. And the faucet water pipes are connected in the side holes.
Step 6: Turn on the Faucet
After ultimately setting up the faucet, turn it on. Check both the hot and cold water tap. If the water flows smoothly, it means you have attached the faucet properly.And if it doesn’t look smooth, check for any leaks or tighten the nuts. I hope that it will solve your problem.
However, it may take a few seconds to start the water flow for the first time. Be patient. It’s completely normal.
Wrapping up
Changing bathroom faucet isn’t a big deal. You can do it yourself without hiring any professional plumber. Furthermore, this guide will make the process buttery-smooth for you.
Enjoy your new faucet!