
Certainly, everyone likes the sense of indulgence offered by rain shower head with that spray of mild water. Unfortunately, the natural spa-like impression can disappear if your shower head clogs.
Thus, learning how to clean shower head will save you the future hassle and bustle. Let’s learn the essential tips to help you to understand how to this without seeking professional services.
Types of rain shower heads
Usually, there are various ways you can use to clean your rain shower head. Ideally, the method you can apply will depend on the nature or type of your shower head. Essentially, there are two types of rain shower heads.
They can be fixed or not fixed. Typically, the fixed rain shower heads like the Artbath may require you to do the cleanliness without removing them. On the other hand, the non-fixed ones may be easily disassembled and cleaned.
How to clean a removable rain shower head
Customarily, there are some simple steps that you should follow in order to get the desired results. Note that you may skip or do some things before the other but that is not recommended. The steps are as follows:
Step one
Carefully, remove your rain shower head. Usually, the best you can do that is by twisting it just from its base.
Step Two
Take water (about half a gallon) and heat it. Next, take some vinegar and mix it with the hot water in a plastic bowl.
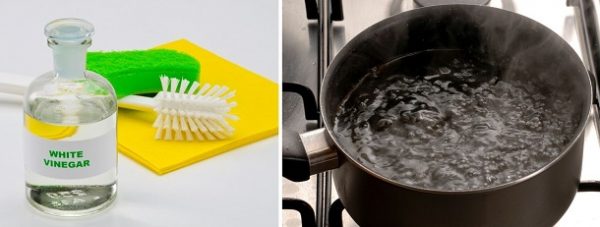
Step Three
Set the rain shower head such that the holes point down. From here, you can pour 6 tablespoons down on its back. This salt will go through the small pipe that is normally used to rotate into the rain shower base.
Step Four
Pour approximately a half cup of the vinegar and water mixture down the shower nozzle. The mix has to go down the rain shower nozzle such that it follows the salt.
Step Five
Put the bowl of the residual vinegar and water solution on level ground. Next, take the rain shower head and put it into the bowl. Most importantly, the shower head’s holes should be facing down.
Step Six
For roughly one minute, swish the water around.
Step Seven
Firmly, hold the rain shower head up the shower drain. Subsequently, pour the residual solvent into the back as you did earlier.
Step Eight
Again, rotate your rain shower head back right onto its base tightly. Generally, how you will do these may depend on the design of your rain shower head. Really, you might want to check your manufacturer’s manual to confirm this.
Step Nine
Ultimately, you will need to flush your shower head. Keenly, switch your rain shower on water and allow the vinegar and salt to flow through it. Preferably, the solution should run through it for about 15 minutes.
How to clean a rain shower head where the head is not removed
Like in the above step, other shower heads can be removed and cleaned by soaking them in a solution. Well, this method work quite well but you might not want to use it. Alternatively, that might be your option. In such a case, you have to apply the following steps:
1. Make use of a big tight bag such as a Ziploc freezer bag. The bag should be enough to slide over your rain shower head. Again, everything will depend on the size of your shower head. In some cases, you may need to use a heavy-duty bag for bigger rain shower heads.
2. Secondly, take 2 tablespoons of some baking soda plus equal parts of water and vinegar. Put the solution to at least half of the plastic bag.
3. Smoothly, slide your bag over the rain shower head. Always, it is good to be sure that the whole head is deep into the solution.
4. Knot the bag firmly with cord or string around the neck of your pipe behind the head. Alternatively, you can utilize electrical tape. Nevertheless, this can be quite irritating to remove later.
5. Patiently leave the rain shower head to soak for at least 24 hours (or overnight).
6. Lastly, remove your bag and turn on the shower. Indeed, this will help to flush the solution through the rain shower head. Expectedly, your rain shower head should be clean and ready to use again.
Read more: Handheld Showerhead For Low Water Pressure
Frequently Asked Question (FAQs)
How to remove mineral deposits from a rainfall showerhead?
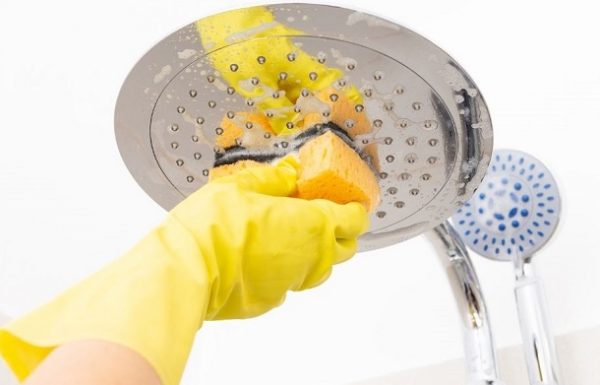
Over time, minerals and other hard substances tend to accumulate at the exit pores on the showerhead. When there is a buildup, it blocks. That is the best time to get rid of these deposits.
To remove them, massage each nozzle with your finger. Alternatively, you can also use a toothbrush to clean it.
Another way to rid it of mineral deposits is by use of a toothpick! If removing it turns out to be an impossibility, then you may have to unscrew the showerhead and wash it physically!
What is the best way to clean a clogged rain shower head?
There are two ways with which you can do this. The first step is to unscrew and wash it physically in water.
Secondly, you can fill a plastic bag with white vinegar and then wrap it around the showerhead. Leave it overnight, then turn on the water to remove vinegar towards the tail end of the process.
How long do you soak your rain shower head in vinegar?
You can do it for one hour to twelve hours. It depends on the severity of the stain on the showerhead. If it is light, then you can do it for an hour. The vice versa is true!
Conclusion
Ordinarily, cleaning your rain shower head is not difficult obligation. In fact, you can do in less than 10 minutes after practicing these tips.
Ultimately, you will realize that this is a task you can apply your skills and easily save some cash. Just follow the steps keenly and be sure to do a regular cleaning.
Hi
Great job for publishing such a beneficial web site. Your weblog isn’t only useful but it is additionally really creative too.
Thanks.