We don’t know about you, but we’re not big fans of those shower faucets that come with the RV. Why would we be? They don’t stay smooth for long and not so good with quality as well.
Thankfully, there are a few quality shower faucets out there that come with the ability to take off those hassles. But to get there, you need to replace the faucet first, right?
Maybe you’ve been thinking about taking professional help but why would you need that if you can learn how to replace RV shower faucet all by yourself? Well, that’s what we are about to help you out with.
Removing RV Shower Faucet
Clearly, you need to take the existing one out first if you want to put the new one in there. So, you’ll have to take care of the ‘removal’ part first. Well, that’s not a tough nut to crack if you can just follow a few steps like –
Step – 1: Turn the Water Supply Off
You’re not planning to take a shower in an unexpected way, are you? If not then make sure that you turn the water supply off first. Otherwise, the moment you’ll remove the shower faucet, you’ll make the whole shower room take a bath along with yourself.
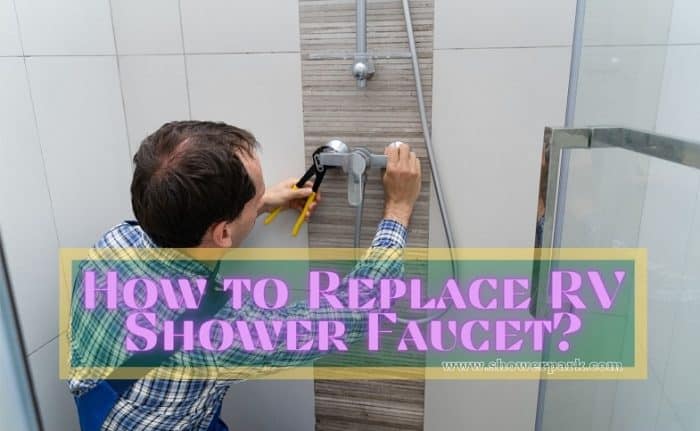
Step – 2: Disconnecting the Hot and Cold Water
For that, you need to find out the faucet’s access panel first. It will let you reach the back of the shower faucet, where you’ll see the water lines for hot and cold water. Once you get there, make sure that you’ve disconnected the water intake.
One more thing! We don’t know if you’ve noticed that in other RVs or not, but the access panel in different RVs can be at different places. If you don’t know where is yours, then you better check out the owner’s manual for that. But in case you’ve lost that too, then give the manufacturers a call to have a direction on that part.
Step – 3: Removing the Nuts
After disconnecting the water lines, you’ll see there are two nuts in the access panel holding the faucet. Start rotating them one by one to remove the faucet. But before you do that, make sure that you’ve removed the showerhead connection from the faucet on the front side of it.
While removing the nuts, put a towel under the faucet. That’s because once you take out the nuts, the faucet will fall on the ground, and you don’t want it to get damaged in the process.
Installing the New RV Shower Faucet
It’s time to get real with your new shower faucet. Make sure the one you’ve got for your RV is perfectly compatible with the faucet opening. Otherwise, you might end up returning the faucet, and if you install it forcefully, it might cause leakage sooner or later.
Step – 1: Clean Up the Faucet Area
As the faucet has been there for a long time, there will be dirt and gunk under it for sure. Clean it up with a cotton pad and alcohol. You can use other solutions too if you like, but we think rubbing alcohol will give you a better and quicker result here.
Step – 2: Put the New Faucet in Place
Now take the new one out of the packet and put it in the place of the old one. Check out if it’s been struggling to get into the holes or not. Make sure the knobs are not turned on as this way connecting the water connection will make the water come out unwantedly.
Step – 3: Putting the Nuts On
Right after that, get back to the access panel and put both of the nuts on. Make it tighter to ensure a better fit so that it doesn’t come off with any force pulling. Once you’re done with that, put the hot and cold water intakes in their previous place too. Don’t forget to check for any leaks in there.
Step – 4: Connecting the Showerhead Hose
You’ll be seeing a connecting point on the faucet for a hose. Install the rv showerhead hose in there and tighten it up. After connecting that, go to the water supply and turn it back on.
Once it’s all okay, turn on the knobs and check if the water is coming out of the showerhead flawlessly or not. Look for leaks here, too as you don’t want to waste any water when you’re not in the shower.
Can You Replace RV Faucets with Regular Faucets?
Clearly, when you’re on the move, you might not always get shower faucets written ‘RV’ on them. The only option you’ll get around is the regular faucet.
Now the question is, will you be able to replace the RV shower faucet with the regular one. The answer is yes, but on the basis of a certain condition, and that is, it has to be compatible with your RV’s faucet opening.
There are hundreds of variations in regular faucets on the basis of design and performance. So, you need to make sure the one you’re choosing will be a perfect fit for your RV.
Take the measurement of your before you go for the purchase so that you don’t end up picking up the wrong one. Also, check the design to match your current faucet’s design.
How to Understand If the Shower Faucet Has to Be Replaced or Not?
Every disease comes with some symptoms. Just like that, you can easily understand when to replace the faucet of your RV from the signs you’re seeing on it. If you want to be sure whether the faucet has to be replaced or not, look out for the following signs.
Dripping Water
The prime purpose of having a faucet is to control the flow of the water, and it does that without causing any extra wastage of water. Once you see dripping water or water is running even after you’ve turned the shower off, you better go for the replacement. This is the common sign we see when a faucet goes bad.
Tighter Handle
Check out if you’re having any problem turning the shower handle. If it’s getting harder with time, then maybe that’s because it’s time to replace the faucet.
Stuck Handle
Are you noticing lately if you’re not being able to turn the faucet handle at all? This happens when the faucet goes bad. So, once you see that, you better start looking for a suitable replacement.
Final Words
When you’re on the run, there’s no guarantee that you’ll be getting professional help on the way to put on a new faucet. But that’s not going to be a problem if you know how to replace RV shower faucet all by yourself. After finishing this article, we bet you’ve understood that it’s not hard for you to pull off.