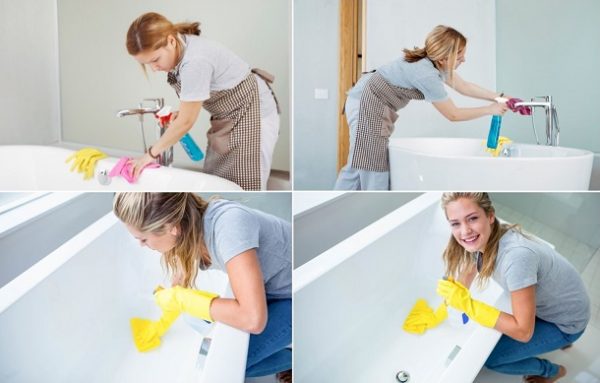
Cleaning anything isn’t always annoying and time-consuming! It can be fun at times, especially when we talk about cleaning the whirlpool tub. But if you still want to know how to clean whirlpool tub with ease, this article is just right for you.
After spending 24+ hours online, I did complete research finding the most convenient and basic technique of cleaning. And this is the place where you’re going to get all the nooks and crannies about making your whirlpool tub perfectly cleaned!
From bleach to a single piece of a flat-headed screwdriver, make sure you gather all the things required for cleaning. And yes, when you take the step of filling your tub with plenty of water for cleaning purposes, choose hot water instead of cold.
To get detailed knowledge about cleaning your whirlpool tub more effectively, and keep on reading till the end!
Essential Things Required for Cleaning
It’s necessary to gather up some of the essential things before you start cleaning the whirlpool tub, especially if you don’t want any interruptions while cleaning it. Please hurry up and try to collect them all.
- Bleach
- Dish Soap
- Toothbrush or Dental Floss
- Wrench (Adjustable)
- Screwdriver (Flat-headed)
Step-By-Step Guide of Cleaning Whirlpool Tub
So, have you collected all the pieces of stuff needed for cleaning? If yes, then you’re just a single step away from learning the proper way of making your whirlpool tub spick-and-span. Let’s get started!
Step-1: Adding Hot Water and Bleach
Begin the process by filling your tub with hot water. Do the task in a proper way so that it can cover up to two inches of jet area.
After that, add a half cup of bleach to the tub. I prefer using a stronger bleach for the first stage instead of anything else.
Step-2: Running the Jets
Next, you can start the jets and wait for about ten minutes. Noticed anything? Yes, in the first two minutes of the run, the floating black flakes will be visible on the water. And, when ten minutes are over, the tiny flakes will increase in number.
Finally, you can have a tub full of black flakes over it. When the water settles down, you’ll get the full vision of it.
Now, you better clean up the entire gunk that came down out of the jets. Rinse it well and let the tub drain all the mess. Afterward, you can jump to the next stage of cleaning.

Step-3: Using a Dish Soap
Repeat the same “tub filling” job with the hot water, but you’ll have to use dish soap instead of bleach this time. Be sure to add a few drops only. Also, you can use a few teaspoons of any low-sudsing liquid dishwashing soap as an alternative.
Remember, you can’t use any other dish soap that can make bubbles like an avalanche in the tub. So, feel free to keep the amount of suds a bit lower.
Step-4: Running the Jets
Once again, you have to run the jets so that the gunk can come out. Similar to the previous step, try to wait for about ten minutes. Even in this stage of the process, you’ll notice the floating things in your tub.
But, the amount might be lower this time. So, you finish cleaning the gunk one more time by rinsing the tub and letting the gunk drain down.
In order to rinse the tub, you can use cold water and flush it well. Then, repeat these four steps until you don’t clean the entire gunk out of the tub.
Step-5: Using a Soft Cleanser
After the cleaning with chemicals, you can actually finish the job by using only the water, especially if you don’t notice any gunk. But, if you’re extra conscious like me, then using a soft cleanser won’t be a bad idea at all!
Extra Cleaning Tips
When you see the tub is clean and tidy, it feels really good to enjoy the bath. However, if you unexpectedly experience anything wrong concerning cleaning, my below-mentioned tips will be helpful for you!
- Clean the jets with dental floss, or you can use a toothbrush instead to remove the dirt in the best way possible
- After using the tub, wipe it with a regular cloth and make it clean as well as dry
- Remove the jets using a screwdriver, wrench (as a lever), and clean them with a non-abrasive cleaner.
Frequently Asked Questions
How often should you clean your whirlpool tub?
To be honest, it totally depends on you! But if you ask my opinion – you should at least clean the tub once a month if the tub is used more often with oils and shampoos.
Also, you should use bath oils and bath salts (low foaming) that suit the tub. For example, oil-based additives or bath soaps like bubble baths. Why?
Because the foaming properties of improper bath oils will get intense due to the whirlpool action and the remainder can possibly get stuck on the pipes.
How to clean jets in a whirlpool tub?
You can clean the jets from the outside by using a toothbrush if you find any dirt surrounding the jets. Or dental floss can also do the trick for you.
But, if you can’t reach the dirt but you can see it in the jets, then it is time to remove the jets and give it a good wash.
To remove the jets, you need to insert a screwdriver between the surround and the jet. Then, pressurize the screwdriver by hand, or you can use a wrench to do that. The force will get the jet out of the tub.
Now, clean it by using a regular non-abrasive cleaner and done. Then, place back the jets and apply a little pressure so that it can get back to its position.
What is the black stuff coming out of my jetted tub?
The black stuff is a combination of a lot of junk and gunk. For example, when you leave oils, soaps, molds, bacteria on human skin, and other junk in the water after bathing, these residues form black flakes after going down to the pipes.
Since the whirlpool tubs can’t remove water completely after the bath or use, the water stays in the pipes. As a result, bacteria and molds grow on them, and thus, the black flakes come into existence.
Wrapping up!
Hopefully, you’ve learned almost everything about how to clean whirlpool tub. Not only I’ve shown you the easy-peasy ways of cleaning, but I also have given you the answer to some of the probable questions about cleaning your whirlpool tub.
Was the whole procedure a snap? I hope so!

