
A flange is one of the most necessary components in the toilet. Its other name is a closet flange. In some other regions, it may go by the name of the water closet! A flange, in definition, is a pipe fitting that connects and secures a toilet unit to the drainpipe on the bathroom floor.
The procedure of installing it can be a mirage, especially if one is new to it. However, there is always a standard way of fixing it. You can either do the installation in brand-new construction or even replace the old one in an old building!
It is important to note that you can install it either on the tile or a concrete surface.
Here is the procedure for installing one in a newly established construction.
How to do the installation in new construction on a concrete surface?
The procedure is as follows:
Step 1.
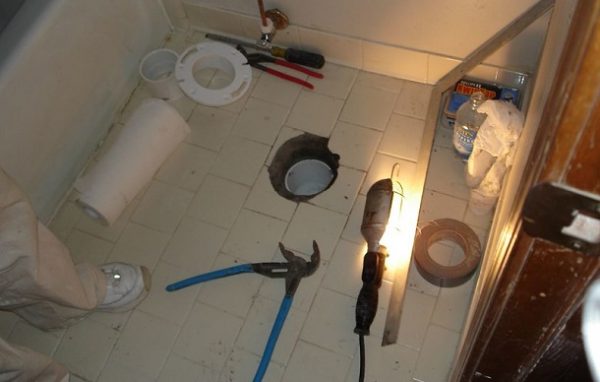
Assemble all the material that you will require to accomplish the task. Luckily, since you are in the construction work, you must be having all the tools for the job!
Among the things that you will also need to include the hacksaw. When everything is ready, you will be able to begin work.
Step 2.
Cut the soil stack of the flange to make it match the floor’s concrete surface. If it is uneven, then it may not fit each other well. The tool to use for this purpose is the portable hacksaw. It cuts through the stack with a lot of ease.
Step 3.
Put the toilet’s flange closet into a drainpipe in the shower room. It rotates with ease around the drainage pipe since the collar has to get into the concrete floor.
Test the system, and if it does not work well, then there must be something wrong with the installation! Rectify the mistake and try it out again. It should be able to rotate well.
Step 4.
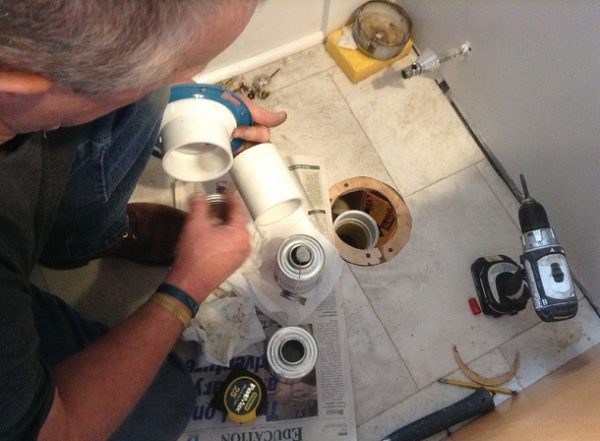
Remove the flange of the closet from the drainage pipe and place it away. Apply primer to it. Apply the PVC primer to the interior part of the soil pipe, as well as the exterior part of the flange closet.
Proceed to cement all sides of the toilet flange. Reset it to the drainpipe as you observe some care. If you miss the point, it may stick wrongly, and you may require to redo the work again!
Step 5.
The flange has rims that rotate. They are for adjusting the angle with which they should be. Always make sure that it is parallel to the wall behind it. To achieve this, you have to rotate them to the point.
From there, apply the PVC cement to stop further movements, or else it will move and block the system! If that happens, you will have to deconstruct the entire system to make the necessary adjustments.
Step 6.
Tighten the rim using screws and bolts to prevent the flange from moving after the installation. The best type of screws to use is the stainless steel ones. It is because they do not rust or even corrode.
Any motion of the rim will cause the system to block, and it might be costly and time-consuming to carry out the repairs!
Step 7.
In the flange package, there are two bolts for the closet. Fit them to the collar of the toilet flange, making sure that the threading faces an upward direction.
Place the wax to the ring of the flange for the installation of the toilet at a later stage.
You are through with the work, and you may need to test the system to find out if it is functioning also!
How to install a toilet flange in new construction on a tile floor?
The procedure of installing it is a bit different from doing it on the concrete ground. Before you begin the work, make sure that you have all the necessary materials and tools for the exercise!
The procedure is as follows:
Step 1.
Place it on the tile and make sure that the holes in the back should be parallel to the wall behind it. On the other hand, the two slots also need to be in parallel lines with the two partitions on the side.
Step 2.
Mark the points where you will drill on the tile floor. Make sure that you get these points correct so that you do not damage the concrete floor.
You have to pierce at least four spaces so that the flange can stand firmly. Use a drilling machine that offers variable speed to make the holes on the floor.
Step 3.
Place the flange over the holes and start tightening the screws, one at a time. Use a screwdriver to do the task. Ensure that you fasten all screws and that you set up the flange appropriately.
That is to prevent the toilet flange from moving. If it does so, then you may have to recheck your work and correct the mistakes to keep it firm.
If everything is okay to this point, then you have done a great job!
What is its work?
It acts as a stabilizing floor mount for the toilet. The flange is a product of PVC, steel, copper, or even a brass pipe. You will need to pair it with either a plastic or a metal ring that secures it to the floor of the bathroom. You then have to seal the drain of the toilet to prevent leakages.
Can the toilet break? How does it do so?
The flange can break with a lot of ease. One of the causes of this problem is the uneven floor. Another factor that contributes to the breakage is the irregular setting of the system.
When setting it up, make sure that you do not leave spaces between the flange and the floor. If you notice that your toilet has this condition, I would advise you to use it until you make the appropriate repairs. You should also make sure you build it to the right height!
What happens if it breaks?
It renders the toilet unfit for use until when you do the replacement. When the rings break, the flange will not hold securely.
The wax ring will also disengage, and the water will begin to seep out through the spaces. One problem will lead to another, and they multiply quickly!
How do you fix a broken toilet flange?
The process of fixing it is almost similar to that of installation unless you are only replacing specific parts. I would always urge you to do a total replacement if the damage is massive, or otherwise, you should work on the given sections.
To begin, you should dismantle the flange to reach the part to repair. Do not forget to put on protective gear such as gloves and nose masks. That is because it might not be clean to handle with bare hands!
Can the toilet flange be replaced?
Yes, you can always replace the flange when it is not functioning well! The first sign of the problem is water seepage and leakages.
It is not a difficult task to do, and once you lift the toilet off the flange, you will find that it is a manageable project! You can either do it on your own or even call the services of a plumber.
Can you install the toilet without a flange?
Yes, it is possible to do the installation without a flange. However, it will not last long. That is because you have to install it in a wood screw or to the subfloor. If the floor is rotting away, then it will not last for long!
Does the toilet flange go inside or outside the pipe?
It goes inside always, but it is not uncommon to find one outside the pipe. However, you should have a sleeve to secure it too. That will prevent it from falling off due to external pressure.
A toilet flange outside the pipe does not usually last long, and hence the reason I would always advise you to have it go inside.
Do we have different sizes of toilet flanges?
Yes, they are of different sizes. However, the standard measurement is 4×3. The top of the flange is always 4 inches, and the bottom diameter of the pipe is 3 inches.
Conclusion.
Fixing a toilet flange for new construction is not a difficult task. Always make sure that it is stable and does not block before securing it to the floor! Failure to do so might make it not to last long.