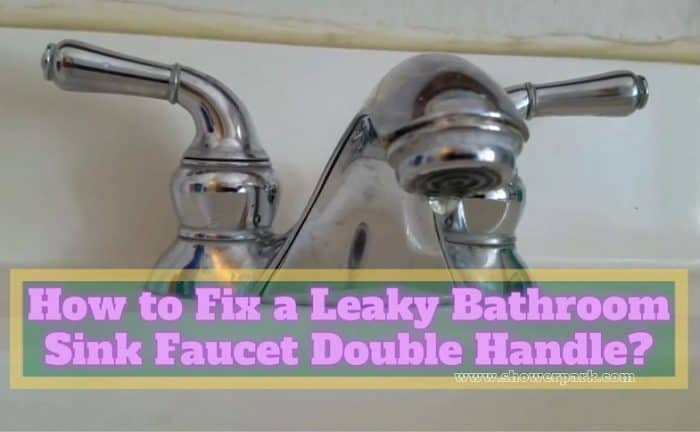
A bathroom sink faucet can leak due to many reasons. And there’s no greater annoyance than the sound of dripping water when you are trying to get some sleep. But not many people know how to fix a leaky bathroom sink faucet double handle.
The method of fixing varies depending on the type of sink faucets. But if you’re handy with the tools you have, you can get it working in no time at all. However, you may need to invest in a new set of bathroom sink materials and aerators at times.
Needless to say that you could use some guidance in such trying times. Let’s find out why your sink drips and then how to fix it, shall we?
Why Does My Faucet Leak from the Handle?
Unless you live in a possessed house, there are generally five reasons why a faucet may leak. Here they are-
- Worn out bearings
- Mineral-deposited aerator
- Worn out gasket
- Loose O-ring
- Valve seat corrosion.
So, before calling in a mechanic, try to check out whether it’s any of these five. And also, whether you’re capable of fixing it yourself. That way, you can save some dough for later.
How Do I Find out Which Side Is Leaking on the Faucet?
It’s super easy to find out what side is leaking on your faucet. Under your sink, you’ll find two water supply valves that, well, supply the water to the sink.
Turn off one of the valves to see whether the sink faucet is still leaking. If it’s not, that valve is working fine. So, it directly means that it is the other valve that is the problematic one.
You can check it out for yourself to be completely sure, though. Sometimes, there’s a false alarm the first time.
Anyway, if you move on to repairing, make sure to turn off both valves. Unless you want to low-key flood your apartment, keep the water supply off.
Necessary Tools/Materials to Fix a Leaky Double Handle Faucet
If you have a knack for fixing mechanical issues around the house, you should already have most of these tools. Again, some of these are faucet-specific, and you’ll probably have to buy them separately from hardware stores.
Here’s a shortlist of the tools and materials that you may need while fixing the faucet. So run down to the store while you still have time! Run! (Just kidding).
There is no need for any haste until you have properly evaluated the leak situation. Stay calm, and follow the proper steps accordingly.
- Flat screwdriver
- Philips Head screwdriver
- Standard wrench (adjustable)
- Normal pliers
- Needle-nose pliers
- Slip-joint pliers
- Hex wrenches
- Allen wrenches
- Necessary faucet parts
- Plumbers grease
- Faucet valve repair kit
- Faucet valve stem
- Faucet cartridge stem
Damn, that’s a lot of stuff! You may not have the faucet-related materials in your toolbox right off the bat. But don’t worry. You can usually fix the adjustability issues in your faucet with just the first eight tools in here.
How Do I Stop My 2-Handle Faucet From Dripping?
Finally, it’s time to find out how to actually stop the double handle faucet from dripping. It’s important to note that there are three types of faucet systems – compression, cartridge, and ceramic disc.
We will help you to figure out the dripping solution in all three of these types one by one.
1. Compression Faucet
The washer is tightly bolted in a compression faucet, i.e., compressed down to ensure proper water flow. Here’s a guide on how to fix compression faucet leaks in 8 easy steps.
Turn on the Faucet
First of all, turn on the faucet (not the valve!). This will help you to get rid of any of the remaining water left from the previous sessions.
Cover the Drain and Put a Towel on the Sink
Once the water has dried out, put a covering on the drain to protect it from any untoward damage. Put a towel over the sink too to prevent hard particles from hitting your precious marble sink.
Try to take off the aerator from the faucet. Usually, the problem lies in the aerator as it wears out with time.
If you find that there are lots of mineral particles deposited inside the aerator, that’s the issue. The deposited mineral holds in water that later drips on continuously even when the valve is off.
Wrap the Aerator
If there’s a heavy mineral deposit, you can’t take off the aerator so easily. Use a muslin cloth to wrap over the aerator after soaking it in baking soda and vinegar. The concoction will get rid of the nasty mineral particles.
Twist off The Faucet Head
After waiting for at least an hour, twist off the faucet head to take out the aerator. Check properly to see whether you can continue to use this one or need a new one because this one suffered extreme damage.
Replace the Things
Take apart the old faucet. Everything you can get your hands on. The chances are that you will need to get a replacement for all of them.
Keep the parts in a bag and take them to the hardware or faucet store to get replacements. Make sure to keep a picture of all the parts beforehand so that you don’t forget any of the parts.
Reassemble the Faucet
After coming back home, reassemble the faucet one part at a time. After installing the new aerator, keep the water on for a while. This will help you flush out the system and check whether the assembly works or not.
Tighten All the Parts
Tighten the parts that need tightening and loosen the ones that are too compact. Turn the valves off and on to see if it still drips. If it doesn’t, bam! You have achieved victory at last.
2. Cartridge Faucet
Unlike the compression faucet, the methods to fix a cartridge one are comparatively easier and faster. Here are four ways you can do it yourself –
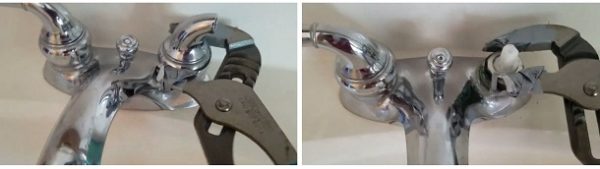
Take the Faucet Handle Off
Take off the faucet handle itself. You can use the adjustable wrench to pull this off. After the faucet handle, take off the clip/retaining nut as well.
Replace the Cartridge
Pull out the cartridge. You can use the pliers first to pull up the cartridge and then pull them out. Get a brand new cartridge of the same type from the hardware store. And then, install them in the reverse way of how you took ’em out.
Install the Nuts and Clips
Similarly, install the retaining nuts and clips. And then eventually the faucet handle. Make sure to tighten the screws around the handle.
You can also replace the seats and springs under the cartridge. That way, you can say that you have taken care of the entire thing.
Check for Leaks
Turn on the valve, fix the water pressure, and check for leaks. If there isn’t any, congratulations, you have succeeded once again.
3. Ceramic Disc Faucet
Lastly, here’s the easiest 3 step guide to fixing a ceramic disc faucet. This one will mark the end of your struggles with drippy two-handle faucets.
Take off the Faucet’s Handle
Like the cartridge faucets, take off the handle using adjustable wrenches and set screws. You will find a cylinder-shaped disc underneath the handle. Loosen its mounting screws and retaining nuts to take off the cylinder.
Replace the Cylinder
Run down to the store and get a new cylinder of the same type and faucet. Install the new one in place of the old one.
Reassemble the Faucet Handle and Check It
Reassemble the system, i.e., place back the faucet handle properly. Slowly turn on the water to see whether the new cylinder is working correctly. Now, give yourself on the back for succeeding once again. You did an amazing job throughout the instructions.
Conclusion
By now, we bet you know exactly how to fix a leaky bathroom sink faucet double handle. It turns out, all you (generally) need is a trip to the general store and then replace the worn-out parts.
However, if the problem persists, it’s advisable to take the help of a professional mechanic. Best of luck!
May Like These: