What do you miss the most after spending a pile of hours behind that desk in your long and exhausting day? If we’re not wrong, it’s a nice and cool bath in a tub that you’ve got in mind. That’s what we would’ve thought of if we were there in your place.
But for that, you’re going to need a whirlpool bathtub first, aren’t you? The surprising fact is you can get one all by yourself if you just learn how to install a drop in whirlpool tub. Otherwise, you’ll have to go to the professionals, and they won’t do it for free.
So, the best way to save some thick bucks here is to get your own hands a bit dirty. Now the question is, how you will get it done? Well, that’s the answer we’ve been waiting for you.
How Do You Install a Whirlpool Tub?
There’s no doubt that installing a whirlpool is going to take a ton of effort and energy. But if you’re planning to do it in a scattered way, you’ll have to multiply that effort and energy ten times.
So, the best way to keep them at their lowest is, following some specific step in a proper synchronization like –
Step – 1: Building a Frame
First of all, you’re going to need a setup to place the tub and that’s what a frame is all about. Try to keep the directions of the manufacturers in mind while building it, especially on the height part.
Make sure that you’re attaching a 2×4 ledger against that or those walls where you’d snug that tub of yours. Be careful with the frame planning, as you’ll have to keep in mind the tile and backerboard’s thickness.
Step – 2: Cutting and Attaching Beckerboard
Take cement backerboard strips and cut them to put on the frame’s top. Make sure that you’re attaching those pieces with special backerboard screws, and the pieces are overhanging the framing by ½”.
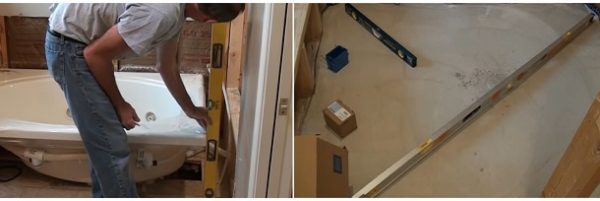
Step – 3: Checking the Fit
You know the size of the tiles you want to use in the installation. Cut a few spacers with a thickness 1/8″ higher than those tiles. Put those over the backerboard where you’ll have the tile. Check out the fitting of the whirlpool by setting it in place. It’s important to ensure the tub’s reach to the right depth.
Step – 4: Checking the Position of the Drain Trap
If there’s anything that matters the most for sliding the whirlpool wastage, then it’s nothing but the drain trap. So, make sure it’s positioned at the right height. You can make that connection from your basement or can go for the crawl space below.
Step – 5: Putting Waste-and-Overflow Unit Together
Now it’s time to lay your hands on the tub’s waste-and-overflow unit. In case your tub doesn’t have one, get a standard one, and don’t forget about adding an extension. Then put the shoe in its tee fitting.
Step – 6: Tightening the Nuts
Once you’re done setting your tub on the two overturned buckets, start installing the overflow. Make sure that you’ve tightened the nuts properly on the drain extension.
Step – 7: Mixing Mortar
You need to be sure about whether the waste-and-overflow unit is slipping in the drain-trap or not, and the best way to do that is test-fitting the whirlpool.
Then after removing the whirlpool, you better Screw 2x2s surrounding that drain hole so that you can keep the mortar away from it. After that, make the mortar mix and pour it on the floor.
Step – 8: Setting the Tub
As you can’t do it alone, take the help of a second person and set your tub in its place. Make sure that you’re doing it gently as you don’t want to damage it. Once you’ve set it properly, leave it that way so that the mortar can hard.
Step – 9: Connecting to the Drain
Now get the tub’s waste-and-overflow connected to the drain. Once you’re done with that, get the fittings tightened.
For attaching the motor in its place, use the screws for it and use some lumber pieces too if you feel you’re seeing it’s going to need some support. Now plug its cord into a GFCI receptacle and test the whirlpool.
Step – 10: Installing Backerboard
Now get the cement backerboard and install them on the open sides. Make sure that you’re driving the backerboard screws properly. After finishing that part up, check out the corners and wrap them. The best way to do that is using fiberglass mesh tape.
Step – 11: Adding Tiles
It’s time to add the tiles on the external sides. Make sure that you’re applying thinset mortar to put them on.
How Much Does It Cost to Put in a Drop in Whirlpool Tub?
Like any other luxurious setups, a tub costs a pile of cash too. So, before you put your hand in the job, stay ready with enough green to invest. Thankfully a whirlpool tub doesn’t cost as much as the jetted bathtubs.
If you’ve had your share of research on that, then you probably already know that jetted bathtubs cost between 1500 dollars to 17000 dollars which is surely a big deal.
On the other hand, you can have a nice and beautiful whirlpool tub in your bathroom by spending an amount between 1250 dollars to 10700 dollars. Now if that’s not cheaper, we don’t know what is.
Can You Put a Shower Over a Whirlpool Tub?
Yes, you can. It’s not a crime to picture a whirlpool tub without a shower over its head. But the truth is you can have one with a shower too if you like.
Actually not every day you’ll have enough time to fill up the tub and take a long bath. So, on those days when you’ll be in a hurry, we say you can go for a shower if you like. Plus, it can be a time saver too.
Why Getting a Whirlpool Tub Is Not a Bad Decision?
After seeing how much work you need to do to put a whirlpool tub in your bathroom, you might be wondering that it’s not a good idea after all. Well, we can’t agree with you on that because:
- A nice whirlpool bath can reduce your joint pains and is quite useful in treating Arthritis.
- Whirlpool baths can be really helpful in improving the flow of blood and increasing circulation.
- For beating the stress whirlpool bath can be amazingly helpful. Plus, it helps with reducing insomnia too.
Final Words
Once you learn how to install a drop in whirlpool tub, we don’t think anything or anyone will be stopping you from fulfilling your dream of having a whirlpool tub. But make sure that you’re following the steps properly. Otherwise, you might land on a mess this time.