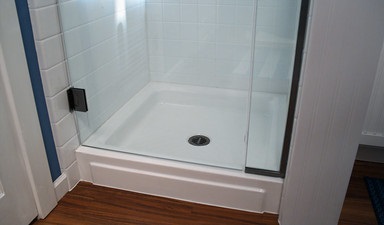
A shower base is also in some instances referred to as a shower receptor or a shower pan. This is the part of the shower system that needs to be tightly affixed to the wall. It provides support to the shower cap, also known as the showerhead. Since it is the part that supports the other parts of the shower system, it has to be strongly attached. If it is not done properly and correctly, it will then easily detach itself due to its weight and the high water pressure.
There are various surfaces that the base can be fixed to. These surfaces can either be concrete base or even the wooden surface. The question that lingers in one’s mind however then is how to do the fixing. What is the procedure of installing the base on a wooden floor? For more information, please read through the article. It is well equipped with modern and useful information about how to do it. Follow through.
So how do we install a shower base on a wooden floor?
As it is with many installations, there has to be a preparation first. You have to get all the required materials, and even a plumber, not unless you can do it by yourself.
The procedure is as follows:
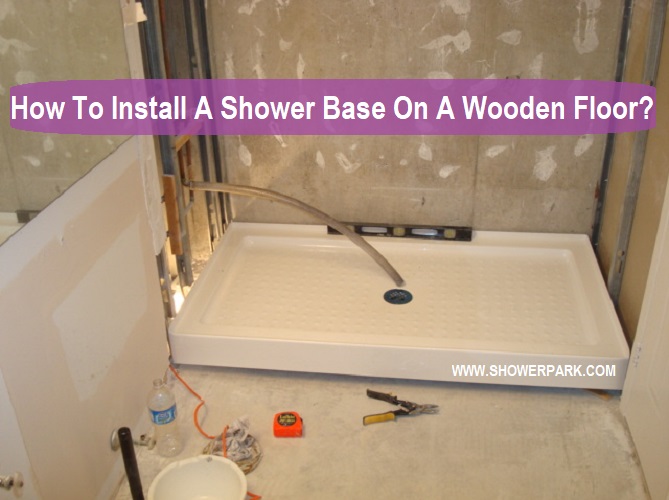
- Take the shower base and place it on the floor. Outline how it will be installed. Make the measurements of that particular part on the floor. This is basically where the hole with which the shower base will be installed will be cut out.
- Carefully, cut out the marked part to generate a hole. Remember that the wood can easily crack if excessive force is applied to it when cutting. I am sure you would not want to have a broken floor. This calls for care when cutting out the marked part. Ensure that you do not cut an over sized hole as it may become a hard task to fill in the extra space. With a concrete floor, cement would be used to fill in any extra space created.
- The shower base has a recess which makes it occupy more surface. Cut that part out so that it can go along the works done on the floor already. As with the floor, it also cut the base with care. Any wrongdoing will lead you back to the shop for a new shower base.
- The base will not stand well if the floor is not flat. Use a floor level liquid tool just to confirm this. If perfectly flat, proceed with the works. If it is not, you may need to shift where to fix the shower base. In the extreme, you may be forced to call back your carpenter to fix the problem of the floor. For most cases, however, the floor, if it was done correctly during the time of construction, will be well leveled and flat.
- Put the shower base in place. Ensure that it fits properly.
- Place the shower lining and insert the nogs. It should hold on to the firm at the point that you have placed it.
How do you level the floor for a shower base installation on a wooden floor?
- Use a vacuum cleaner. Scrub off any rising surfaces such as that of dirt or even leftover from the superglue. You can even use the hammer to knock off the extra hard surfaces that were left behind by the old shower base. When the floor is finally smooth, you would have made it flat. It is necessary however to prove that levelness by using of flat level indicator. Confirm the bubble level. If it lies in the middle of the indicator, then you have done a perfect job.If it still gravitates towards either of the ends, then you still have more work to do. Repeat the entire process now to the entire floor until you achieve the desired flat level results. As you continue, you can mark the levels that portray or show unevenness for further action.
- Revisit the areas that you had marked and start to level them again. These parts need an extra amount of work. Lay down some shims. The level indicator will guide you on which part that you will need to place more shims than the other.
- Fix the shims to the wall by screwing them down. Always check the floor level so that you may not need to redo the corrections at a later stage. The level indicator should be lying on the shims so that it can guide you in the position to adjust. This is by either removing or adding more shims. Repeat the process until you get a perfectly flat surface.
- Clean the floor to remove any dirt left in this second process. Sweep the dust then mop it with water. Get the measurements of where you will spread the leveling compounds. Mix the leveling components in readiness for placing them on the shim.
- Place the leveling component on the shimmed floor. Pour it to the shimmed floor first as this is the first requirement. Spread the mix evenly when it has not yet begun to settle. If it settles before spreading it, you will have to start the whole process afresh.
- Make the compound thinner and use a roller to make it smooth and flat.
- Give it time to dry down, preferably over the night. Check for levelness in the morning. It should be very flat at this time. If not, you will start it over again.
- Now apply the coat to seal off the compound. Give it more time for the coat to dry completely. After it is fully dry, you can now go-ahead to fix the shower base.
Conclusion
Fixing a shower base to a wooden floor would require some piece of art. The procedures set out should be adhered to the latter. Flat surfaces are a necessity for a strong shower base. If you are going to make the floor flat, you must then invest in time. Do not rush the process if you want to have a long-lasting shower base. Give it a try and find out more.