Flow restrictors, also known as water restrictors, are designed to reduce water flow during your shower time.
The United States Environmental Protection Agency reports that showering is responsible for 17% of total water usage of an average American family.
In 1992, the United States passed an Energy Policy Act, and since then, adding a flow restrictor in the shower head has become a federal law. This law allows using no more than 2.5 gallons per minute.
It controls excessive water usage as well as helps to conserve water.This range is even lower for California, Colorado, and New York City.It is definitely an eco-friendly solution to a deadly problem.
But, besides saving your water, it may reduce your water flow as low as you can barely bath. In this scenario, an informative guideline about how to remove the flow restrictor from a Delta shower head might save your day.
How to Remove Water Restrictor from Delta Shower Head
Removing the flow restrictor from the Delta shower head is a simple procedure. You can easily do it yourself by using some basic plumbing tools. It’ll take less than 15 minutes to do this job.
At first, let’s have a look at the list of required tools to remove a Delta showerhead flow restrictor.
Tools You’ll Need:
- Teflon plumbers tape
- Adjustable wrench
- Needle-nose pliers
- Paper clip
- Brush
- Towel
Step-by-Step Process
If you have all of these tools at hand, you’re ready to initiate the removing process. Let’s get started.
Step 1
At first, wrap the pipe or the connector by using a fiber cloth. You can also use the rag to do this job. This rag protects your pipe from tool scratch marks.
Step 2
Check the shower head connection. If there is any nut or any other protector, remove that first. Several Delta shower head has a shower screen attached with the head. If your model also has one, remove that firmly. In case you are not sure about the additional screen, read the user manual before proceeding to the nextstep.
Step 3
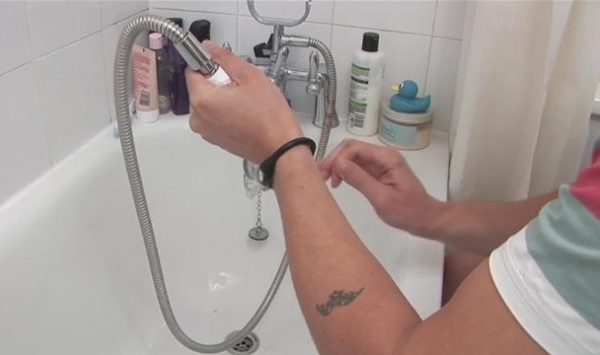
Now, remove the showerhead from your shower panel. If it is connected with the hose, disconnect it from the tube.
You may need an adjustable wrench to unscrew the shower head. Furthermore, use an additional wrench to keep the wrapped cloth in place. Otherwise, the pipe may leak water drips on your bathroom floor. It will be better if you place a water bowl under the shower head as it reduces the possibility of getting a wet floor.
Step 4
Now, take a look at the inside of your shower head. There’s a slight possibility that you can notice the gasket or the black O-ring. Most of the cases, this ring isn’t visible properly.
If you can’t locate the ring, it’s time to use the paperclip. Get a paperclip and unbend the end of it. Use this tool pry up the black O-ring and locate the restrictor inside the shower head.
No products found.
Step 5
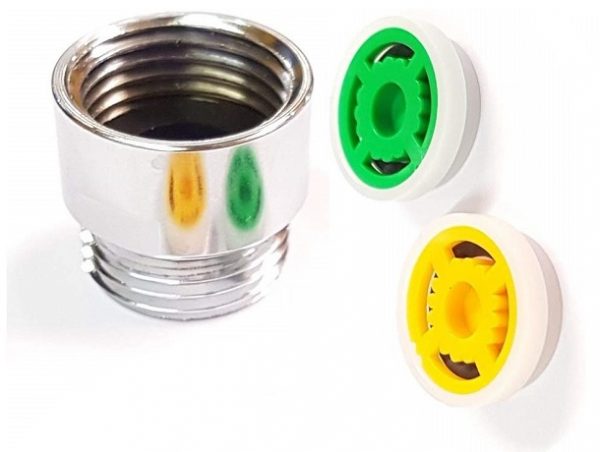
It’s time to remove that O-ring. The flow restrictor will be beside the O-ring. And the resistor looks like a plastic disk, and it is located behind a star-shaped metal.
Usually, the flow restrictor comes in a brighter color than any other component of your shower panel. It is the most straightforward way to identify the resistor. However, if there are no brighter components there, look for something else which blocks the water flow.
Then hook the paper clip under the restrictor and twist it. Thus you can remove the flow restrictor. You can also use a needle-nose plier to perform this task.
Caution: Perform this step with more discretion. In case you are not sure about how to do this step, get help from the user manual provided by the manufacturer. There is nothing to worry even if you lost that manual. You will find an online copy at the manufacturer’s website.
Step 6
If you have an old shower head, it’s not a bad idea to clean it in this step. A thorough cleaning will increase your shower water pressure and make your shower more satisfactory. It’s an optional task. You can skip this step if you want.
Step 7
Now remove the old Teflon tape from the hose and wrap it by using a new Teflon tape. It keeps the showerhead in place.

Step 8
It’s time to insert the O-ring into the showerhead. You can put it in place by using your thumb. When it seems to fit in place, slide it back firmly into its sit.
Step 9
Place the shower screen again on the shower head.
Step 10
Screw the Delta clockwise by hand. You may use the adjustable wrench if you can’t do it by hand. Use that wrench with caution. If you put more pressure than needed, it will damage the shower head. Then use a channel wrench to tighten the head.
Step 11
Finally, this is the end of your journey on removing the flow restrictor from the Delta shower head.Your shower panel is ready for performance checking!
Before checking the water flow, make sure that all of the water-consuming devices of your apartment are turned off. Then check the main shut off valve. Make sure that the main valve is in full speed mode. Otherwise, you will not get the entire water speed.
Then turn on the shower at full speed. I hope that now you get an adequate water flow!
Step12
Keep the restrictor valve in place. In case you want or need to add again, you can use this one without buying a new one.
Caution:
- Removing the water restrictors will increase the water flow in your shower head. As a consequence, your water utility bill will arise.
- Remove the gasket with extra care.
- If you are not confident enough to remove the restrictor, get some professional help. Otherwise, you may ruin your showerhead.
Final Verdict
Most of the shower heads have water restrictor features to reduce water wastage and save your water utility bill. Though it saves your money, it may result in low water pressure in your shower.
If you are in the second category, our step-by-step guideline might help you to get a perfect shower by clarifying this problem.
I hope this guide will work with most of the Delta showerheads available in the industry. However, if you have any questions or inquiries about the removing process, feel free to leave those in the comment box below.
Resources : United States Environmental Protection Agency
Last update on 2024-07-27 / Affiliate links / Images from Amazon Product Advertising API
I have a Delta model 58474-25 shower head. I have examined it closely and there doesn’t seem to be any visible water saver. If you know is there a way to remove it from this model or am I stuck with an expensive low flow shower head?
Thanks
If you can’t fix your old shower head, try to get a new shower head.